 'W.A.S.P' Warning Alert System for Pedestrians -- $199
Installation Instructions -- Tesla Model S (should also work for Model X)
When you received the W.A.S.P. package, it should include:
- Main Control Module (black box)
- USB speaker with a USB power cable and 3.5mm audio cable
- GPS antenna
- OBDII 5v adapter to USB-A socket or 12v->5v Hardwire adapter (depending on your order)
- 8 Channel remote control, with extra battery
- 1 Channel 'Horn' Button
- 3M Dual-Lock fasteners
- Cable ties
All the cable connection ends are color coded with tape to make it easy to hook everything up. Just follow the colors on the connector ends:
- Red: Power connections (OBDII to WASP)
- Blue: USB Power for speaker
- White: GPS Antenna
- Green: 3.5mm Audio cable from WASP to Speaker
Just one tool needed: A plastic trim removal tool (Available at
Amazon), or a flat head screwdriver with some tape over the blade to protect your trim components.
You should also bench-test the system before installation to see where all the cables connect. See Step 10 for all the proper connections, then connect any USB cable to the WASP power cable, and it should all work. You can power the WASP by plugging in the RED USB cable into any USB-A port or charger.
Also, make sure the USB speaker is powered on!
Step 0: These instructions are for using the OBDII 12v->5v adapter for power. If you ordered the unit with the 'hardwired' adapter, that unit takes a 12 volt source as input and 5v USB output to power the EV-Horn. It's up to you to find and connect the adapter to the unswitched 12v source of your choice. You can then start at Step 5 below to route the power cable to the frunk area.
If you have any questions, please email me at: [email protected] and I will try to help as best I can.
Step 1: Remove two driver's side dash trim pieces with the trim tool. They both pop out with relative ease.


Step 2: Unclip the white key fob antenna connector, and place the trim panel aside. The remaining stub connector is easy to loose track of, so just be aware of what it looks like so you can find it later.


Step 3: Unravel the power cable on the OBDII connector. With the OBDII connector in your lower hand and the USB end in your upper hand, kind of 'floss' or 'thread' the wire between these two trim pieces, as indicated in the photos:


Step 4: Plug in the OBDII connector into the OBDII port under the dash, right above the dead-pedal area in the driver's side footwell. You can also tuck any extra wire into the gaps to keep it neat and hidden.
Make sure the OBDII plug is seated firmly on the connector.


Step 5: You'll now be running the power cable into the Frunk area. Fish the cable through the rubber weather stripping as indicated in the photos. If you feel there is a better route into the Frunk, feel free to follow any route you desire. This is just one method. Then feed cable up underneath this door seal flap. The yellow line approximates where the cable should be tucked under this flap. (Alternatively, you can run the cable up the inside of the A-pillar door seal, and about a foot up from the dash through the weatherstripping, then run the cable back down into the groove in Step 6.)


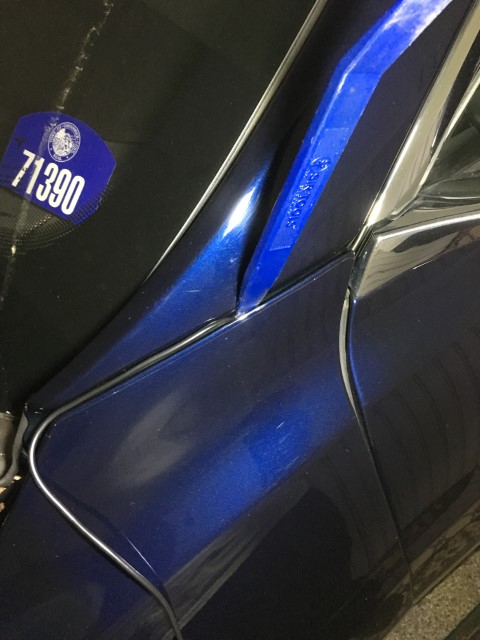
Step 6: Continue to run the cable between the front fender and the 'A' pillar. There is a small gap just big enough for the cable to fit through. It might take a little coaxing with the trim removal tool to hide the wire in the opening. NOTE: DO NOT USE a screwdriver for this step, as it could scratch your paint and/or damage the cable!

Step 7: Remove Frunk trim panel. There is one rubber bump-stop that simply unscrews (see photos). Once removed, the large trim panel will just pop out with a little coaxing.


Step 8: Feed the power cable into the frunk. Run the cable to the inside of the hood hinge (to the left of the hinge when standing in front of the car -- see photo.) Then run the power cable under the rubber shock tower boot as shown.


Step 9: Install the GPS Antenna. Fish the wire bunlde under the bracket as shown in the photo below. The antenna already comes with DualLock tape attached. Peel back the tape and mount in the suggested position below. Attach the screw barrel connector to the black box.

Step 10: Complete the cabling for WASP. Just follow the color coded connectors and you should be all set. Using the included cable ties, gather and bundle up all the extra slack in the power cable. The GPS antenna cable is already bundled up-- you should leave it that way and only remove enough cable to attach to the black box. Make all connections as indicated in the photo.
IMPORTANT STEP: After making all final connections, make sure the USB speaker is turned on


Step 11: All parts are installed inside this 'open space' outside the 'frunk tub' area (see first photo). Mounting the speaker outside the frunk tub will increase the WASP volume outside the car. The USB powered speaker should fit snugly between the tub and the back wall (see second photo) or find any suitable location depending on the USB speaker supplied with the WASP. Some 3M Dual-Lock tape will already be attached to the back of the black box. Peel back the adhesive label off the back side of the Dual Lock tape and position the black box as shown (see third and forth photos)


Step 11: Done! Test EV-Horn using the remote, then replace all trim panels. Don't forget to replace the hood bump-stop and re-connect the white key-fob antenna connector from step 2.
If you have any questions, please contact me as HankLloydRight on TMC or email: [email protected]. thanks!
Back to EV-CPO.com